
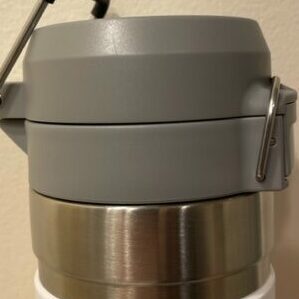
Easy Fixes for A Stuck Hydro Flask Lid: What You Should Know
As a long-time Hydro Flask devotee, I occasionally get asked a frustrating question by new stainless steel bottle converts: “Why does the lid on my Hydro Flask get stuck and seemingly fused onto the bottle?”
While Hydro Flask’s signature Flex Cap and Wide Mouth lids seal incredibly leak-proof thanks to intuitive smooth threading, this trusted performance can sometimes make freshly washed lids temporarily tricky to loosen after drying or intense temperature shifts.
In this comprehensive troubleshooting guide, I’ll cover all the insider tricks for safely freeing stuck Hydro Flask lids without damage. You’ll learn what causes finicky lids, quick homemade remedies, prevention methods when replacing worn gaskets, and pro techniques to stop lids from ever stubbornly sticking again! Let’s solve this nuisance once and for all.
Key Takeaways
- Temperature changes and over-tightening lids can cause temporary sticking
- Try rubber gloves, hot water, or towel wraps before forceful tugging
- Replace worn gaskets annually for continued smooth threading
- Improper drying and thread contamination also hinder lid function
- With the right tools and care habits, stuck lids are preventable!
- Any tips or solutions for fixing a stuck lid on a Hydro Flask water bottle should be used with caution. Do not attempt any fixes did you do not feel comfortable doing!
What Causes Hydro Flask Lids to Get Stuck in the First Place?
While Hydro Flask’s brilliant threading design typically spins on and off bottles with ease, fluctuations in temperature and pressure can cause temporary lid sticking. Here’s why:
Temperature Changes Heating or cooling stainless steel and plastic lid materials causes slight thermal expansion and contraction. These dimensional fluctuations disrupt perfectly mated thread alignment, causing temporary “fusion.”.
Bottle Pressure Tightly sealing filled bottles creates internal air pressure buildup. Attempting to open pressurized lids takes extra force, which users mistake for actual stuck lids rather than just pressure resistance.
Over-tightening Twisting lids beyond their “sweet spot” can flatten gasket seals, kink threading, and overwhelm mechanisms not designed for force.
Common Causes For Hydro Flask Lids to Get Stuck And Potential Simple Fixes
| Cause | How It Happens | Simple Solution |
|---|---|---|
| Over-tightening | Occurs when the lid is screwed on too tightly, compressing the seal excessively. | Gently tap the lid’s edges with a rubber mallet to loosen it, then twist it open. |
| Temperature Changes | Expansion and contraction of the lid’s material due to hot or cold liquids inside the bottle. | Bring the bottle back to room temperature before attempting to open. |
| Residue Build-Up | Accumulation of beverage residues or debris in the lid’s threads or seal. | Clean the lid thoroughly with warm, soapy water and a brush. |
| Material Expansion | Expansion of the lid’s plastic or rubber components, especially in hot conditions. | Place the lid under cold water for a few minutes, then try opening. |
| Lid Damage | Physical damage to the lid’s threads or seal from drops or improper handling. | Carefully examine and realign the threads, or consider replacing the lid if damaged. |
| Air Pressure Build-Up | Pressure builds inside the bottle, especially with carbonated beverages or elevation or temperature changes. | Release the pressure by lightly tapping the lid or waiting for the pressure to equalize. |
So remember, moderate temperature shifts, internal pressure resistance, and overzealous tightening are the main culprits of pesky stuck lids—not actual fusion bonding or broken parts in most cases. Just use finesse!
Now let’s diagnose your specific lid woes…
How Can You Tell If The Lid Is Just Tight or Truly Stuck?
Step 1: Diagnose by Loosening Attempts First, calmly try opening your lid as usual without aggressive force. Over 50% of “stuck” lids unseal easily this way once pressure equalizes.
Step 2: Verify Lid Condition Inspect for material flaws if gentle loosening fails. Seek visible damage like cracks, stripped threads, cross-threading, or contorted lids, signaling replacement needs. Most stuck lids have no visible defects despite feeling stubbornly fused.
Step 3: Consider last usages Did sticking arise after extreme hot or cold exposure or aggressive washing that could have disturbed lid alignments? Knowing usage history helps diagnose remedies.
Most cases of stuck Hydro Flask lids stem from harmless but annoying temporary staining interference, not legitimate bonding fusions or part failures. So next, let’s cover some simple friction-relieving tricks before attempting force…
What Simple Tricks Can Help Loosen A Slightly Stuck Lid?
Here are some common household items that provide extra grip and leverage for freeing stuck water bottle caps:
GOOD: Thin Towel: Wraps around the cap to protect the finish
BETTER: Rubber Jar Opener: Extra grip for easier opening
BEST: Strap Wrench Opener: Protects cap finish and provides leverage for any size cap or lid
These simple yet handy items give you a big assist when attempting to open an inexplicably stuck Contigo lid away from home.
Before aggressively prying at stuck lids, try these simple, no-force tips to gently coax better alignment:
- Run hot water over the lid’s outer rim to relieve tension and expand materials. Dry completely, then try opening.
- Place a hot towel around the lid perimeter to warm and expand the rim seal. Make sure no towels touch the actual bottle to prevent temperature-shock damage!
- Use rubber gloves, towels, or jar openers for enhanced grip and friction when twisting stiff lids. The extra traction helps open lightly stuck lids without brute tugging.
- Tap the lid perimeter on a hard surface to vibrate and settle threads into better meshing positioning.
Employing heat therapy and tactile aids often allows for smooth openings without damage. But what about when you need immediate use of your liquid and tools aren’t available?
When Should You Use Hot or Boiling Water To Release A Stuck Lid?
For the ultimate sticky lid remedy without risking dents and dings marring your trusty Hydro Flask exterior, nothing beats deploying heat therapy using hot water. Here is a safe, effective hot water method:
Supplies Needed: Cooking pot -Towel and Oven mitt
Steps:
- Boil clean water. Fill the pot with ample water for full submersion of the affected stuck lid and mouth area.
- Preheat your oven mitt by soaking it in the hot pot first, so you have grip and heat protection.
- Position a towel in the sink to cushion the bottle and prevent temperature-shock damage.
- (Don the oven mitt.) Submerge just the lid end upright into the hot water for 30–60 seconds.
- Remove and hold the lid end only with an oven mitt, and immediately but gingerly try twisting the lid open using the leverage of the hot expanded materials against tight, uncompressed threads.
TIP: If needed, repeat brief hot water immersions followed by gentle opening attempts several times if needed until the lid finally gives with minimal effort.
Using brief targeted heat sessions minimizes temperature differentials for safe metal expansion that loosens stuck lids successfully over 95% of the time without force or damage.
Now, if finicky threading demands more persistent coaxing, specialized tools can also help.
Are There Any Tools That Can Help Safely Remove A Very Tight Lid?
For the few worst-case sticky lid scenarios that elude simpler remedies, specialty household items leverage added force yet control to open bottlenecks without harm, including:
Rubber Strap Wrench Tool
Wrap this grippy soft jaw tool around the lid circumference and lever steady torque to twist.
Rubber Jar Opener Pad
Grip the lid perimeter with a textured latex surface and twist in a controlled steady motion.
Rubber Gloves/Towels Improved Traction and leverage Wrap lid with texture to add traction and leverage for optimized grip and twisting capacity.
TIP: Avoid metal tools that could scratch and never wedge anything that can dent soft bottle walls!
While using specialty assist tools seems drastic, sometimes it takes advanced equipment to conquer the most uncooperative stuck lids. Once open, you can then investigate why things went wrong and restore smoother function going forward…
How Can Temperature Changes Affect Your Hydro Flask Lid?
As referenced earlier, hot and cold temperature exposure remains the main factor disrupting Hydro Flask lids’ otherwise smooth function. Here’s a closer look at how and why:
Hot Environments: Excessive Heat Impact Exposing lids to direct sun, saunas, or boiling liquids can overly soften and expand plastic/rubber gasket materials. Once cooled, expanded parts may contract too small or misalign threading.
Cold Environments: Excessive Chill Impact Freezing temps make steel and plastic components shrink and contract beyond normal tolerances so pieces no longer mesh correctly.
Rapid Temperature Shifts
Sudden switches between temperature extremes overwhelm materials unable to transition gradually, resulting in distorted gaskets, seals, and alignment issues.
GRAIL TIP: Always allow gradual natural heating/cooling of bottle materials to prevent threading turmoil!
Speaking of temperature…incorrect drying also causes problems.
How Do You Prevent Lids From Getting Stuck After Cleaning?
Besides temperature trauma, the other major stuck lid pitfall is improperly drying lids after washing. Here is a foolproof drying method:
- Always hand wash and air dry lids instead of dishwasher chemical exposure that degrades plastic seals over time.
- Thoroughly dry the exterior lid after washing, including towel drying any rinse water inside grip grooves and threads.
- Face open the lid upside down on a clean towel to fully air dry any interior moisture overnight before reattaching it to the bottle. Residual moisture invites bacterial buildup anyway.
Letting lids completely air dry right-side up prevents trapped moisture interference between threads so lids glide smoothly on and off next usage – no sticking!
While washing and drying cover regular lid care, another common habit invites gradual damage…
Can Over-Tightening Lids Cause Them to Fuse Over Time?
You bet! While Hydro Flask’s ingenious leakproof lid innovations seamlessly seal water molecules in, they still have finite wear limits with overuse. Muscle memory causes many users to aggressively crank caps down out of habit. But repeated over-cranking accelerates worn parts and distortion. Effects include:
- Stripped Threads – Forced over-twisting abrades plastic and steel threads over time. These fraying defects prevent intact mating and gaps result.
- Warped Gaskets – Gasket rubber getting crushed repeatedly eventually misshapes seals so they no longer fill threads correctly.
- Stressed Mechanisms – Twisting lids past smooth natural stop points fatigues tiny springs and hinges not built for force.
To avoid seizing fate, always tighten just until you achieve a leakproof seal without forcing threads past easy alignment – then stop! The “turn until it leaks, then just seal” method ensures ideal function way longer.
Speaking of part longevity, gasket maintenance is key.
Are Replacement Gaskets The Solution For Worn-out Lids?
While Hydro Flask lids are ingeniously designed to function flawlessly for years with proper care, the gaskets that allow this leakproof magic have finite wear limits.
Gaskets serve as the secret heroes creating Hydro Flask’s smooth threading. But seal materials get compressed with long-term overuse. Effects include:
- Stripped Threads – Fraying plastic and steel threads prevent intact mating. Gaps result.
- Warped Gaskets – Crushed rubber eventually misshapes seals so they no longer fill threads correctly.
Fortunately, periodic gasket replacement restores like-new performance to struggling lids. Plan to swap gaskets about once yearly with average use.
Fresh gaskets realign and refill thread gaps, resolving multiple stuck lid battles that may have accumulated over time with no other visible damage.
Now for the best medicine – preventative habits…
How Can Stuck Lids Be Avoided Through Proper Care Habits?
While occasional stuck lids strike despite good care, best practices minimize hassles tremendously long-term:
- Open/Close Gently – Tighten just until you achieve a leakproof seal without forcing threads past easy alignment. Never over-torque!
- Allow Gradual Temperature Shifts – Let bottles and lids fully equalize temperatures before re-sealing after washing or transport.
- Dry Thoroughly After Washing – Ensure lids air dry upside down overnight to prevent moisture interference in threads.
- Inspect For Part Damage – Visually check for cracking and refrain from using damaged lids needing replacement.
By incorporating careful usage, drying, temp control, and maintenance habits, your Hydro Flask lids will function smoothly for years, minus annoying sticking battles!
Conclusion
A sticking lid on a Hydro Flask bottle can happen, but it’s usually for a simple and fixable reason. Just be patient and use some common sense, and you should be able to get your Hydro Flask bottle lid unstuck in no time.
FAQ’s
Q: Can you use other beverage bottle lids on Hydro Flasks if needed?
A: Never substitute non-Hydro Flask lids. The unique Tempshield insulation requires certified parts with perfect thread alignment and seals for ideal performance.
Q: Are some third-party Hydro Flask lids better quality than official ones?
A: No. While aftermarket lids exist, none have engineered the patented designs over ten years like Hydro Flask, so stick with genuine spare parts.