
Few things are more annoying than realizing your trusty Stanley bottle is leaking all over your bag.
A little seepage around the lid when you first fill it up is perfectly normal as the temperature adjusts. We’re talking about a few rogue droplets—nothing major. Just keep it upright and away from your laptop.
What To Do If Your Stanley Bottle Leaks
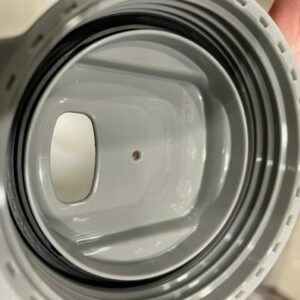
Let’s get to the bottom of this. Start by doing some leakage detective work to pinpoint exactly where it’s coming from. Around the lid? Likely a gasket issue. Bottom of the bottle? Probably an internal vacuum failure. Isolate the drip zone!
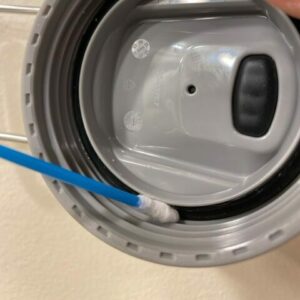
Once you’ve zeroed in on the leak hotspot, try removing the lid and seeing if the bottle itself drips without it. This nifty trick tells you if the lid or the body needs your attention. While the lid is off, inspect that gasket closely for any tears, cracks, or funky warping.
If the drips originate at the lid, the gasket probably got dislodged or worn out prematurely. Easy fix: gently pry out the old gasket, thoroughly clean the rim, and pop in a brand-new replacement. Give it 30 minutes to fully adhere before reattaching the lid. Test for leaks, and boom, you’re back cruising leak-free!
Bottom line: Leaks in Stanley bottles are usually quick DIY fixes away. With some strategic troubleshooting to identify the root issue, you can get that bad boy re-sealed in no time flat. Don’t let a few drips ruin your hydration game!
Now let’s get into the nitty-gritty of potential leak causes and prevention tips:
Is It Normal for Stanley Water Bottles to Experience Leakage?
Before freaking out, know that a little seepage around the lid area when you initially fill up is perfectly normal. As the temperature fluctuates, a slight expansion and contraction of the liquid can intermittently squeeze out a few droplets. It is annoying but not considered an actual leak. Just keep it upright and don’t store it near electronics.
What Causes Leaks in Stanley Water Bottles and How to Prevent Them?
If you’ve got excessive dripping or moisture outside the lid zone, it likely indicates a real leak needing attention. The most common causes include:
| Symptom | Possible Cause | Solution |
|---|---|---|
| 1. Leakage around the lid | – Loose lid – Damaged or misaligned gasket |
– Ensure the lid is securely tightened – Inspect and replace the gasket if necessary |
| 2. Dripping from the spout | – Spout not properly closed – Damaged spout or seal |
– Ensure the spout is closed firmly – Check and replace the spout or seal as needed |
| 3. Water seeping from the bottom | – Damaged or punctured bottle body – Worn-out base or seal |
– Inspect for visible damage and replace if necessary – Check and replace the base or seal |
| 4. Leaks during temperature changes | – Thermal expansion/contraction – Air pressure inside |
– Leave some room for expansion when filling – Burp the bottle to release excess air pressure |
| 5. Persistent leaks despite checks | – Manufacturing defect – Extensive wear and tear |
– Contact customer support for warranty or replacement – Consider retiring an extensively worn bottle |
Other Common Causes Of Leaking Stanley Water Bottles
- Worn-out lid gasket: Damage prevents a watertight seal.
- Loose lid: Failing to tighten sufficiently allows liquid to escape.
- Cracked lid: Fractures or warps allow drips to form.
- Dented body: Dents at the mouth prevent the gasket from sealing tightly.
- Punctured inner layer: Cracks or holes in the steel break the insulating vacuum seal.
- Compromised vacuum: Damage to the vacuum-sealed walls can affect the critical air gap between the double walls
Thankfully, simple fixes exist for each of these common leak causes. It just takes some strategic troubleshooting.
Common User Errors That Contribute to Stanley Bottle Leaks?
Some well-intentioned but incorrect usage habits can unfortunately provoke leaks:
- Assuming minor seepage is normal long-term rather than addressing it promptly
- Failing to adequately air dry after washing traps moisture against interior walls.
- Under-tightening the lid incorrectly assumes it’s sufficiently tightened.
- Continuing to use a bottle with a known worn-out gasket
- Attempting risky DIY repairs like superglue instead of replacing gaskets
But with training and care, users can avoid these common missteps. Proper tightening technique is also key…
Can Tightening the Lid Help Prevent Leaks in Stanley Bottles?
Adequately tightening the lid creates a critical, watertight vacuum seal. However, take care not to overtighten.
- Excessive force stresses the rubber gasket material over time, degrading it.
- Overtightening also fatigues the mating lid and mouth surfaces, eventually cracking them.
- Rotate the lid until a definitive stop point is felt. Don’t force it past this point.
- When properly tightened, the gasket shouldn’t be visibly pinched between surfaces.
Finding the optimal sweet spot takes practice but prevents gasket damage and leaks.
Lid and Seal Inspection: Key Steps to Identify Potential Leaking Issues
As the primary sealing component, gasket condition is critical. Look for any:
- Cracks, embedded debris, shrinkage, distortion, or tearing.
- Gaps when pressing along the perimeter to confirm a tight seal
- Hardening, drying out, or brittleness—it should remain flexible.
- Stretching without resilience indicates wear.
Catching gasket issues early prevents major leakage headaches. Another common user error is overfilling:
Could Overfilling a Stanley Bottle Be the Culprit Behind Leaks?
Exceeding the recommended maximum fill line can also cause preventable leakage.
- Overfilled liquids have less air volume for thermal expansion as temperatures fluctuate during use.
- Pressurized carbonated beverages require ample headspace to avoid dangerous buildup and potential bursts.
- Foamy contents like smoothies are also prone to overflow escape if overfilled.
Sticking to the fill line is key for mess-free carrying. Temperature shifts also impact leaks.
How Do Temperature Changes Impact the Leak Potential of Stanley Bottles?
With vacuum insulation, Stanley bottles maintain their content temperature. But conditions and cycles can strain seals.
- Heating and cooling cycles cause liquid and air expansion and contraction that stress lid seals.
- Big temperature swings quickly promote lid condensation.
- Freezing bottles risks making rubber gaskets inflexible.
Avoiding drastic or repeated temperature shifts minimizes potential leaks. With some thoughtful preventative care, your Stanley bottle will deliver years of reliable leak-free performance. Just take it step-by-step!
What Should I Do If My Stanley Bottle Continues to Leak?
For stubborn leakage even after gasket changes and proper tightening, contact Stanley’s support:
- If under warranty, they will evaluate replacement options.
- For older bottles, Stanley can assess the damage and quote potential repairs.
- In some cases, a full replacement may be offered at a reduced “new bottle” cost.
Stanley wants to rectify leak issues to maintain brand satisfaction and loyalty. Next, let’s examine how Stanley lids minimize leaks.
How Stanley Lids Prevent Leaks
Far from an afterthought, Stanley’s engineering minimizes lid leaks through:
- Leakproof seals use precise tolerances and gasket friction fit.
- Insulating properties regulate temperature shifts that can degrade seals.
- Durable materials withstand repeated openings without warping or cracking.
- Textured, ergonomic gripping for proper tightening.
- Flow-controlling straws and openings that re-seal when idle
- Locking mechanisms to secure the lid in a sealed position when stored.
Every detail aims to deliver a worry-free, leak-free drinking experience when properly maintained. Up next: why freezing causes leaks.
Freezing and Leaking: Understanding the Connection with Stanley Bottles
Allowing Stanley bottle contents to freeze risks leakage through:
- Ice expansion deforms the watertight vacuum layer.
- Rubber gaskets become inflexible and leaky in freezing temperatures.
- Material contractions weaken seals by introducing small gaps.
While most leakage is preventable, freezing is best avoided whenever possible.
User Maintenance Practices To Help Prevent Leaks in Stanley Bottles?
With attentive care, you can maximize leak prevention.
- Periodically inspect for gasket wear, replacing them at least annually.
- Follow Stanley’s cleaning recommendations using gentle, eco-friendly cleaners.
- Always fully air-dry the bottle after washing before sealing.
- Avoid over-tightening during use and cleaning.
- Keep bottles away from extremely hot or sub-zero freezing temperatures during storage.
With good preventative habits, your Stanley can deliver years of leak-free performance.
What to Do If Your Stanley Bottle Leaks During Outdoor Activities?
Despite best efforts, leaks occasionally happen out on the trails. Here are some tips if it occurs:
- Carry a backup water container if available until the leak can be properly addressed.
- Temporarily wrap the lid with waterproof tape to stop drips.
- Place the bottle upright in an exterior side pouch to contain leakage.
- Avoid direct sun exposure that could worsen thermal expansion issues.
- Once home, thoroughly clean and air dry before inspecting the cause.
Don’t let surprises ruin your fun! Now let’s look at some FAQs.
FAQs
Q: Is some minor lid condensation normal?
A: Yes! Some droplets from temperature changes are expected and not considered a true leak. Just keep the bottle upright.
Q: Can overwashing cause leaks?
A: Yes, repeated dishwasher use and harsh scrubbing degrade gaskets over time. Gentle handwashing is best.
Q: Should bottles be replaced after years of use?
A: Not necessarily! With gasket replacements and proper care, Stanley bottles often last for decades without leaking.
Q: Why does my new bottle leak while my old one doesn’t?
A: Some minor leakage can be expected during the initial break-in period as seals settle into place. Give it 1-2 weeks.
Q: Can I fix leaks without replacing the gasket?
A: Possibly, very thorough cleaning and re-lubricating the gasket perimeter with silicone grease may temporarily revitalize a slightly worn gasket.

About Me
I’m Paul Burkhardt, an expert in water and water treatment since 2006 with in-depth experience not only in treating water but also in helping to provide people with healthier, high-quality drinking water.
I’ve helped thousands of people with their drinking water questions, including what kind of water bottle might be best for them and their lifestyle.
If you’d like more information about me, please check out the links below or read more here:
